Using Multimedia Resources
Multimedia resources can be used to teach vocabulary words, background knowledge, and new concepts. This strategy is part of Colorin Colorado's ELL Strategy Library and can be used to support academic language development for all students.
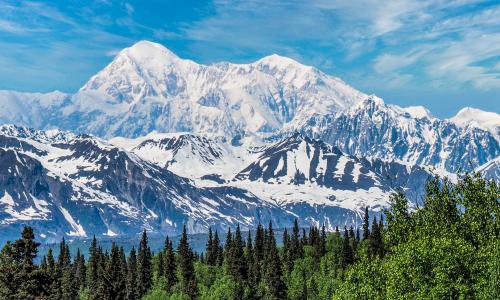
Image: Mount Denali
Strategy Overview
How This Strategy Supports Language Development
Multimedia content for students can include educational videos, podcasts, audio clips, music, slide shows, webcams, online exhibits, and virtual reality (VR) experiences. Multimedia resources offer an effective way to make content more comprehensible, build background knowledge, support students with academic speaking and writing, and bolster student engagement.
Many multimedia resources made for students are available through a variety of free and paid services.
Step-by-Step Instructions
- Choose a multimedia resource that clearly illustrates key concepts or vocabulary. Keep the clip or presentation brief.
- While sharing the resource, pause regularly to discuss the content, create sketchnotes, or write notes on key points and vocabulary.
- Create frequent opportunities for students to process and discuss what they saw, heard, or experienced.
- Consider sharing the resource a second time so students can check their notes.
- Ask students to use their notes to orally summarize what they learned with a partner or write a short summary.
- Refer to your multimedia resources throughout the unit as a visual anchor.
Note: See our additional ideas in our strategy about Using Images with ELLs.
Lessons Learned
- When using videos, choose short clips (1-5 minutes maximum) to illustrate a point, build background knowledge, or set context. Students may lose interest after longer periods, especially if they only understand parts of the narration.
- Make sure the audio on audio or video clips is clear so that students can understand what they are hearing.
- Be intentional about your choices and ask yourself, "Will this support my students' comprehension of this content?"
- If a video or VR experience is longer than 5 minutes and students need to see or experience more than this, consider showing different chunks on different days. Because of the frequent pauses for interaction, clarifications, and note-taking opportunities, even a 5-minute video can take 20 minutes or more to complete in a class period.
- If the narration of a video or virtual reality simulation does not closely match the vocabulary and content students are expected to learn, play the video or experience on mute and narrate the events or content to more closely match the grade-level standards. For example, in this video about feeding reindeer on a reindeer farm on Alaska from Molly of Denali, the farmer gives step-by-step instructions using one set of terms. The girl who is taking notes writes down the steps in her own words. In order to fully understand the whole video, you would need to many different vocabulary terms. However, you could select key terms related to the process, give students a list of the steps out of order using those terms, keep the video on mute, and ask them to number the steps in the correct order as they watch the feeding process take place.
Differentiation
- Provide students with graphic organizers and word banks.
- Pre-teach key vocabulary words and concepts as needed.
- Take screenshots of key moments from the video clip or VR experience. Print these screenshots or put them on a google slide with labels of key content concepts and vocabulary. Students can then use these screenshots to sequence events of a story or process, retell what they learned, write questions, etc.
- Provide students with appropriate transition phrases for their retells or discussions.
- Use a subtitle translation tool available with many videos to support students at beginning levels of language acquisition.
- Provide transcripts of audio or video clips that students can read in advance or use to follow along.
- Allow students to watch the video or experience VR in their heritage language.
Co-Teaching Considerations
Content or Grade-Level Teacher
- Choose a multimedia resource to build background and comprehension of the topic.
- Determine the language expectations for the lesson/unit. Which words will students need to use to master this concent?
- Determine stopping points in videos that are essential for comprehending the content. Note the timing for that point and write prompts or questions to ask at that stopping point.
English Language Development Teacher
- Take a look at the multimedia resource students will be using. Identify key terms and concepts related to the resources.
- For videos, watch the video clip and determine if the language used in the clip closely matches the grade-level expectations or if the video should be shown on mute with teacher narration.
- Review the questions or prompts for each stopping point in the video and create scaffolds for students who may need more support in order to answer that question (word bank, sentence frame, additional visuals, an example, etc.)
- Show the video in the heritage language of a small group of entering/emerging level students and add additional supports as needed.
Examples
| Audio | |
|---|---|
Topic: Native Code Talkers in World War II
| Overview: The Native Words, Native Warriors website from the Smithsonian National Museum of the American Indian provides a rich multimedia presentation of content about Native Code Talkers from different tribal nations who have served in the U.S. Military across multiple conflicts. |
Listen to Constructing the Code (Section 4.3), including the recording from Code Talker Chester Nez. A transcript of both recordings is also provided. Student questions
| |
| Radio story | Climbing Algonquin, the big dome that rises over the Adirondacks NPR reporter Brian Mann went for a snow trek in the High Peaks of the Adirondack Mountains in upstate NY and sent an "audio postcard." (Photos and a transcript included are online.) Recorded sounds in this piece include:
(Note that some of the vocabulary used in this story relates to the video on climbing Mount Denali below. For more related videos on mountain climbing, see the National Geographic 360° Video Series videos on Mount Everest.) |
| More audio resources | Other sources for audio include:
|
| Video | |
|---|---|
| Topic: Climbing Mount Denali in Alaska | Video: Climbing Denali These sample comprehension questions can be used with "Climbing Denali," a short video produced by the PBS Kids series Molly of Denali about the differences between climbing Mount Denali in the early days of mountaineering and today. |
| Topic: Parallel and Perpendicular Lines | Video: Line it Up! Parallel and Perpendicular Lines Susanna Post, 2021 Arkansas Teacher of the Year, explains a strategy for remembering the difference between parallel and perpendicular lines. Here are some sample prompts for using this video with students. A lesson hand-out is also available from PBS Learning Media. Before the Video: Look at the title of this video. What do you think it's about? Watch the first 30 seconds of the video and then pause. 0:31: What question will this video answer? Check your answer with your partner. 1:17: We just learned about parallel lines. Turn to your partner and explain what parallel lines are. (Pause and call on a student after they share.) That's right, parallel lines are two straight lines that never touch. Now turn to your partner again. What was the teacher's trick for remembering the word "parallel"? I want you to talk about it with your partner and then write the word "parallel" using arrows the way that she did. |
| Virtual Reality & Online Experiences | |
|---|---|
Virtual tours | Students can take virtual tours of many different kinds of sites -- historic monuments, national parks, museums, and more! Some tours layer in additional elements, such as background information and links to historic photos. You can show students around the tour, or they can interact with the tour. Student activities might include:
Examples include:
|
| 360° Videos | These videos provide an immersive experience and the ability to click on the video to pan and change views. The above student activity ideas can work well with these, and they are available on so many kinds of topics that students can choose one of interest to focus on. Examples include:
|
| Webcams | Many zoos, parks, and other sites have live webcams, such as the:
You can see more from around the world on Explore.org. |
| Online Exhibits | Many museums offer online exhibits. Here are some highlights:
|
| Story Maps, Slide Shows, and Games | Story maps and slide shows also offer numerous possibilities for interacting with content, as well as models for student projects. Highlights include:
|